Recipes from The Golden Ball, Henley 

Liz Nicholls

recipes

Priya & Ben Watson of The Golden Ball in Lower Assendon share two special winter recipes which have the ‘wow’ factor! 

The Golden Ball – Henley-on-Thames

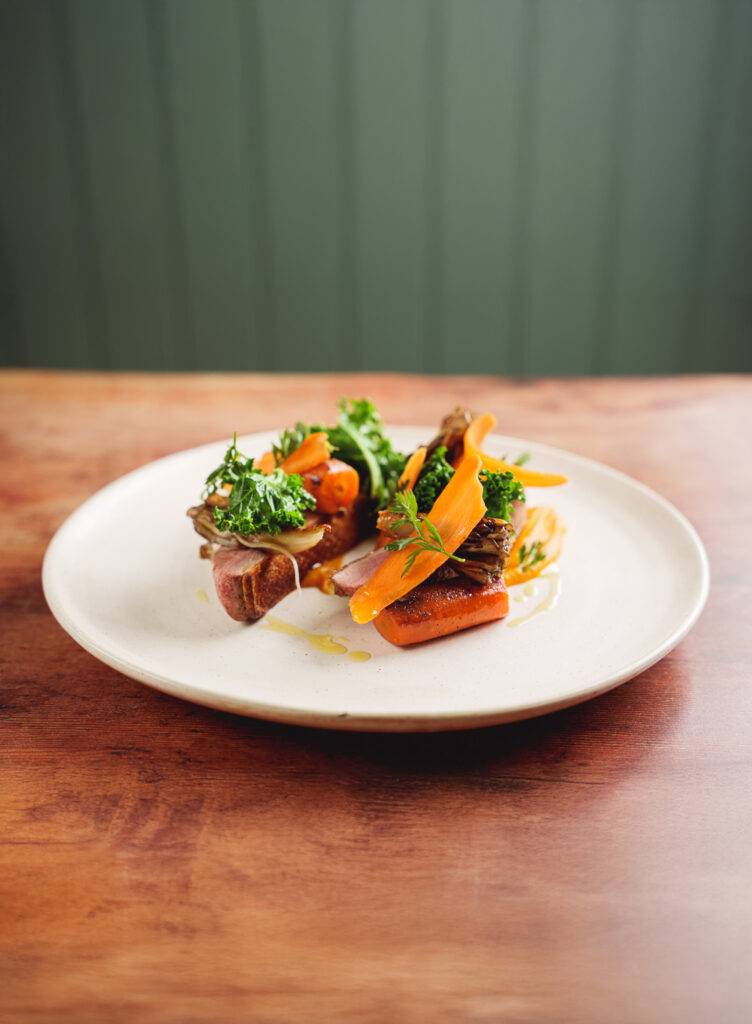
Roasted breast of English duck with carrots, Swiss chard and wild mushrooms 

Serves 4
Ingredients:
• Four duck breasts
• 10 large carrots
• One bunch of Swiss Chard
• 250g of wild mushrooms
• Two large potatoes
• 1 litre chicken stock
• 100g unsalted butter
To garnish (optional)
• One carrot shaved with a peeler
• Carrot tops

For the sauce:
• 1kg of chopped duck bones (ask your butcher to do this for you!)
• 1 large onion chopped
• 1 large carrot chopped
• 1 stick of celery chopped
• 1 cloves of garlic
• 10 sprigs of thyme
• 10 black peppercorns
• 1/2 bottle of red wine
• Two litres of fresh beef stock

Method
1. Start by making the duck sauce. Get a large pan on a high heat and when hot add some flavourless oil followed by the duck bones. Allow the bones to roast in the pan until golden brown then add the chopped vegetables, garlic, thyme and peppercorns. Stir until combined and allow to cook for a further 2 minutes. Next, add the wine and reduce by 3/4 then add the stock. Reduce the sauce on a medium heat for around 30-40 minutes or until it has thickened to a sauce consistency. Pass through a sieve and discard the solids. Retain the sauce in a pan until required.
2. Next, make the carrot puree. Add some flavourless oil to a medium sized pan and warm up on a low heat. Peel and finely slice six of the carrots, add them to the pan and add a pinch of salt. Give them a stir then cover with water and cover. Keep cooking on a low heat for 15-20 minutes or until cooked through. Once cooked, transfer to a blender and blitz until smooth. Allow to cool and set aside.
3. While the puree is cooking, prepare the fondant potatoes. Preheat the oven to 180oc. Peel the potatoes and slice them in half lengthways. Using a knife, trim the 4 halves so they resemble a circular shape then transfer to a deep baking tray. Divide the butter into four and place on each potato. Season with salt and pepper then add the stock to the tray and place in the oven for 40 mins or until cooked through. Use the tip of a sharp knife to check they are cooked through but be careful as they will be fragile. Allow to cool and set aside.
4. Next cook the Duck. Starting warming a large frying pan big enough for the duck breasts on a low heat. Season the duck breasts with salt and once warm, add 1 tbsp of flavourless oil to the pan. Add the duck skin side down and gently fry for around 12 minutes or until the skin is golden brown and crispy. Next flip the duck over and cook for a further 2 minutes. Remove from the pan and allow to rest for at least 10 minutes before serving.
5. Whilst the duck is resting, prepare the rest of the ingredients for finishing the dish. Warm up the potatoes in the oven and the puree & sauce in separate pans. Put a medium frying pan on a high heat and when hot add 1tbsp of oil. Once hot, add the mushrooms to the pan and quickly fry for 2-3 minutes. Remove from the pan and season with salt and pepper. Use the same pan to cook your Chard leaves letting them wilt for about 1 minute, then removing and seasoning with salt.
6. Finish the dish by placing 2 spoonfuls of the puree on each plate followed by a potato. Carve the duck in two lengthways and place both slices on the plate. Cover with the mushrooms and chard and pour some sauce over each plate.
7. Finish with the raw carrot slices and carrot tops.

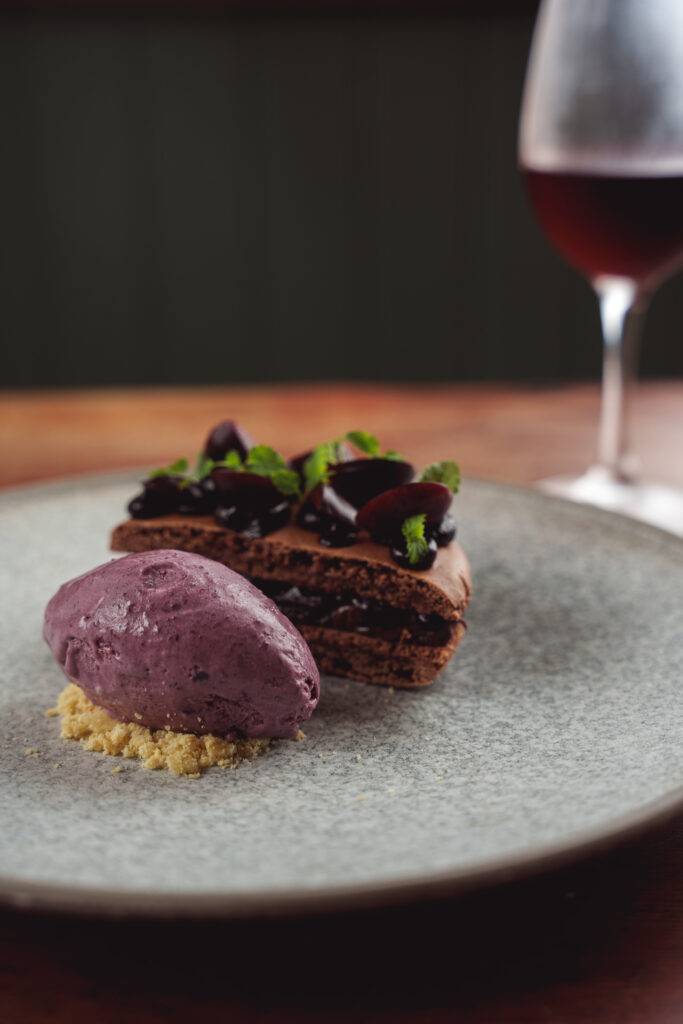
Chocolate Macaron

Ingredients:
Chocolate Ganache Macaron Filling
• 120g semi-sweet chocolate or chocolate chips
• 20g unsalted butter
• 120g double cream

Chocolate Macarons
• 110g aged (separated 24 hours before making) egg whites – about 4 large eggs
• 110g granulated sugar
• 126g superfine almond flour
• 126g powdered sugar
• 14g unsweetened cocoa powder

Cherry ice cream
• 250ml Double cream
• 250ml milk
• 90g egg yolk
• 90g caster sugar

Recipe
Chocolate Ganache Macaron Filling
1. The chocolate ganache filling needs about 2 hours to set, so I recommend making it first.
2. Place 120g of semi-sweet chocolate and 20g of unsalted butter in a medium-sized bowl and set aside.
3. Pour 120g double cream into a heat-proof bowl and heat in 15 second intervals in the microwave until it just begins to bubble. Pour the cream over the chocolate and butter. Make sure all the chocolate is submerged beneath the cream. Let the mixture sit for a couple minutes.
4. Use a hand blender or a spoon to mix the ganache until the mixture has come together and is smooth.
5. Press a piece of cling film flush against the ganache to prevent a skin from foaming.
6. Place the bowl in the fridge to chill for about 2 hours.

Chocolate Macarons
1. Line two large baking sheets with parchment paper or silicon mats. Set aside. 
2. Pour 110g of aged egg whites into the bowl of a stand mixer with a whisk and mix on a medium speed until the surface of the egg whites is covered in small bubbles. Continue to mix until it reaches the soft peak stage where you can see the whisk leaving faint tracks in the egg whites. 
3. Gradually add 110g of granulated sugar into the eggs and mix on a medium speed for 30 seconds. Increase the mixing speed to a medium high speed. Keep mixing until stiff, glossy peaks form.
4. Sift 126g superfine almond flour, 126g powdered sugar, and 14g of cocoa powder into the meringue, then fold the ingredients together with a rubber spatula. Use a circular motion that sweeps around the edge of the bowl and then pull through the bottom of the bowl to make sure everything is getting mixed together.
5. Fold until a thick ribbon of batter runs off the spatula when it is lifted. You should be able to draw a couple figure 8’s with the batter running off your spatula when it is the right consistency. If the stream of batter breaks before you’re able to this, you may need to stir it a bit more.
6. Pour the batter into a large piping bag fit with a medium-sized round piping tip and pipe 6 2 1/2 inch rounds on the prepared baking sheets, spacing them about 1-inch apart.
7. Pipe one pan at a time and bang the pan firmly on the counter a few times to release air bubbles, then pop any remaining air bubbles that come to the surface with a toothpick.
8. Let the macarons rest for 30 minutes, or until they develop a skin. The macarons should look matte once the skin has formed. While the macarons rest, preheat the oven to 157 C.
9. Bake  on the middle rack of your oven for 18-20 minutes and rotate the pan halfway through to help them bake evenly.
10. Remove the pan from the oven and let the macarons cool on the pan (about 15 minutes), then gently remove them from the silpat mat.
Assembling These Chocolate Macarons 
1. Place the chilled ganache in a small piping bag fit with a large round piping tip. It should be thick enough to scoop into the piping bag and hold its shape.
2. Pipe a thick dollop of chocolate ganache on one macaron shell. Gently press a second shell on top of the ganache to create a sandwich. 

Cherry Ice Cream
• 600ml single cream
• 200g whole milk
• 8 free-range medium egg yolks
• 140g caster sugar
• 1 tbsp vanilla bean paste
• 200ml double cream
• For the cherry sauce
• 400g ripe cherries, stoned and roughly chopped
• 60g caster sugar

Method
1. Put the single cream and milk in a pan and warm until steaming. Meanwhile, mix the egg yolks, sugar and a pinch of salt in a heatproof bowl and put it on top of a pan of barely simmering water (make sure the bowl doesn’t touch the water), then mix in the cream/milk with a balloon whisk.
2. Stir the custard regularly with a wooden spoon, heating it gently over the hot water until the custard thickens to a pouring consistency and coats the back of a spoon (10-15 minutes). Remove from the heat, then strain the mixture through a fine sieve into a jug and mix in the vanilla paste and double cream.
3. Pour the mixture into the ice cream machine and churn until thick and smooth (or see tips).
4. Meanwhile, to make the cherry sauce, put the cherries and sugar in a small saucepan and gently simmer for 5-8 minutes until they break down and are soft and juicy. Spoon into a mini food processor (or use a stick blender) and whizz until smooth, then push through a fine sieve with the back of a spoon, discarding any solids left in the sieve.
5. Once the ice cream has finished churning of after your last whizz in the food processor or mixer, swirl the cherry ripple sauce through the mixture, then carefully spoon the ice cream into a plastic lidded container and freeze for at least 4 hours or until solid.

You’ll get the smoothest results with an ice cream machine, but if you don’t have one, pour the custard, without the ripple, into a plastic container and freeze for 1 hour. Scrape into a food processor or electric mixer and whizz until smooth. Freeze for 30-60 minutes, then repeat the process 2-3 times. Ripple in the cherry, then freeze.


Latest posts

Game on! Venison recipes for autumn

Liz Nicholls

recipes

We’re sharing two recipes using venison, a sustainable, ethical local meat, thanks to Chiltern Venison & Robin Popham of Create Terroir

Geoff Wicket, founder of Chiltern Venison, is on a mission to show how this game meat is a great alternative to minced beef.

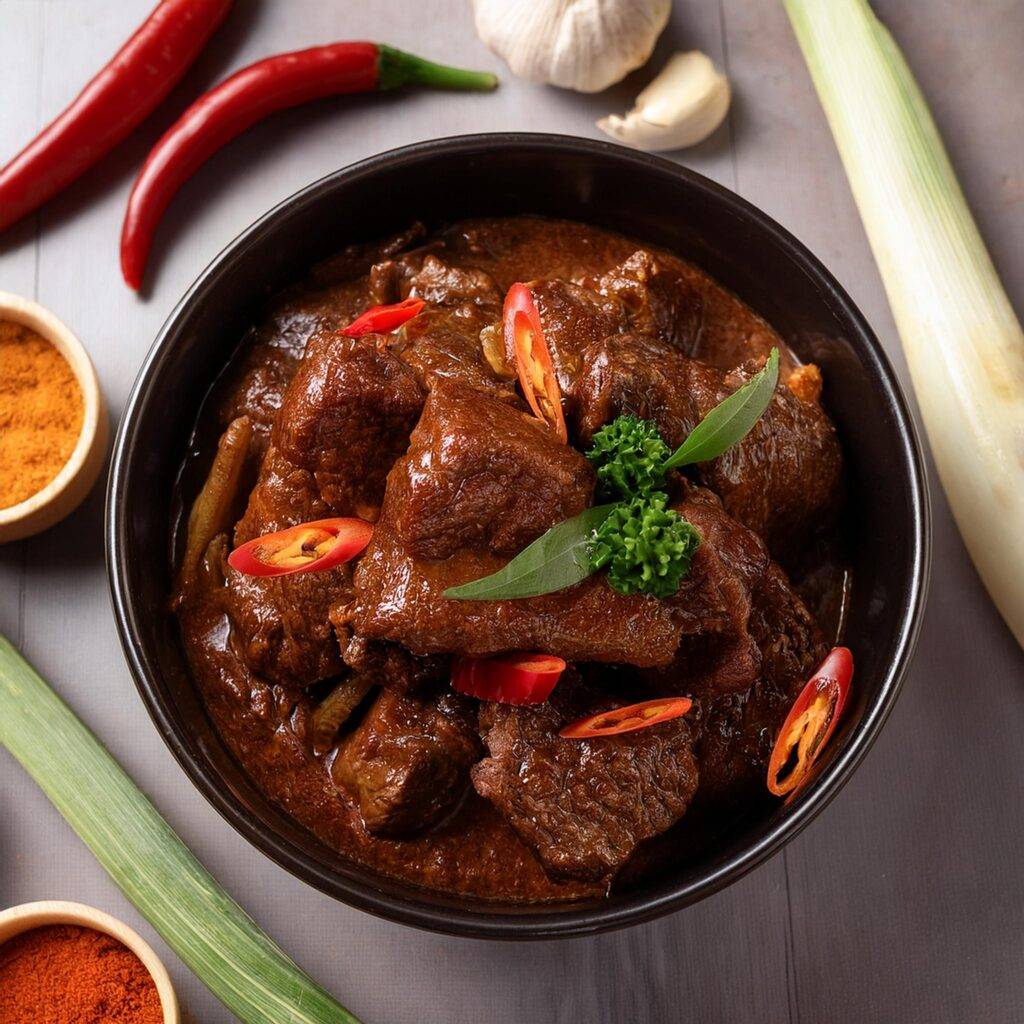
This recipe for a Thai classic, thanks to Robin Popham at Create Terroir, is explosively tasty, without being hot. Robin says: “Rendang is bursting with flavour and tender meat. Allow the simmering and cooking times for the best results, but at a push this can be truncated.”

Venison rendang:

Serves four (freezes well)
Ingredients:
For the paste:
• 15 dried red chillies
• 8 shallots or 2 banana shallots
• 4cm root ginger, sliced
• 3 lemongrass stalks, root end, sliced

For cooking:
• 5 tbsp vegetable oil
• 680g cubed venison (haunch dice is perfect; stewing venison is also good, though less aesthetic)
• 2 lemongrass stalks (whole)
• 800ml coconut milk
• 4 tbsp desiccated coconut
• 2 Makrut (previously known as ‘kaffir’) lime leaves
• 1 beef or chicken stock cube
• 2 tbsp tamarind paste
• 1 tsp caster sugar
• 0.5 tsp salt
• Basmati rice

Method
1. Prepare the paste
Boil 15 dried chillies in enough water to cover them. Simmer for 15 minutes. Drain, cool, and split to remove seeds. Blend the chilli flesh in a processor with shallots, ginger & lemongrass. Add a little water if the paste is too coarse.

2. Cook the rendang
Heat 5 tbsp of vegetable oil in a heavy casserole pan. Fry the paste for five minutes over low heat. Add the venison and remaining lemongrass stalks. Stir fry to brown the venison. Maintain medium heat to avoid drying out the meat or paste. Pour in 800ml of coconut milk and 250ml of water. Bring to a boil, simmer for two hours, stirring occasionally to prevent sticking. Toast the desiccated coconut in a dry frying pan over low heat until golden brown. Add the toasted coconut, Makrut lime leaves, stock cube, tamarind paste, caster sugar and slat into the casserole. Cook for a further 30 minutes until the venison is tender. It’s normal if the oil starts to separate.
3. Serve
Remove the lemongrass stalks before serving. Serve your venison rendang with basmati.

Venison Ragu

“Spag Bol” this is not! Spaghetti Bolognese has been adopted into British culinary culture with open arms, adapted to suit our tastes and ingredients, however its origins are quite different. Emanating from deep within Italian culture, Ragu alla Bolognese uses only a handful of ingredients, cooked simply.

The base flavour comes from a combination of three vegetables, or soffritto, before adding ground meat and stock. Tomato puree provides a richness and viscosity to the sauce but by no means is this a tomato sauce.
Venison shoulder is ideal, with a fabulous flavour and texture well suited to mincing and cooking in this manner. This recipe is both quick to make and uses only two pans, ideal for a weekday family meal.

Ingredients:
• 500g minced venison shoulder
• One large carrot
• One large onion
• One leek
• 50ml rapeseed oil
• One dessert spoon of tomato puree
• Salt and pepper to taste
• 350g stock, preferably venison
• 80-100g fresh tagliatelle
• Hard strong cheese to finish

Method:
1. Begin by heating a heavy based saucepan or casserole with a lid. Add the rapeseed oil to lightly coat the base of the pan then gently brown the meat in two batches over a medium heat. It is important not to burn the pan as this will taint the flavour of the final sauce. Once brown remove from the pan to a plate.

2. While the meat is browning, finely dice or grate the vegetables. Preparing as finely as possible means they will almost melt as they cook, bringing body to the sauce.

3. Once the meat is browned and removed from the pan, add the prepared vegetables, season with a little salt and turn down the heat to a minimum. Place a lid on the pan allowing the steam to build up inside, dissolving the leftover crusty bits from browning the meat. Stirring occasionally, leave for around 5 minutes or until the vegetables are soft and translucent.

4. Remove the lid, add the tomato puree and turn the heat up to a medium setting. While stirring lightly cook the puree for a few minutes until it takes on a deeper colour. Now add the mince back to the pan and turn the heat up. Once the ingredients begin to sizzle add the stock and bring to a gentle simmer. Taste and add a little salt if necessary. Put the lid back on and cook over a gentle heat for 30 minutes.

5. While the sauce is cooking bring a large pot of water to the boil and put a colander in the sink to drain the pasta.

6. Once the sauce has cooked for 30 minutes, remove the lid and turn up the heat to evaporate any remaining liquid. Cook the tagliatelle as per the instructions if you are using shop brought pasta, or 3 minutes for home made. Drain and add to the sauce. Now season with pepper and mix.

Serve with grated hard cheese, I have used Witheridge in Hay which is a sharp cheddar style cheese from Nettlebed Creamery.

Chef notes

1. Venison mince can be cooked far quicker than beef due to the greatly reduced fat content. A long cooking time will dry out the meat as there is no fat to give that perceived moisture. Mincing the shoulder creates very short strands of muscle fibre for perceived tenderness.

2. Soffritto provides the flavour backbone to many Italian dishes, comprising of carrot, onion and celery. The three vegetables bring a complementary contrast of sweet, sharp and savoury while adding texture. Celery has a punchy texture and flavour, too strong for this recipe, so leek has taken its place to bring a fresher flavour and, with the onion, a mild balancing acidity.

3. When to season is almost more important than what to season with. Adding salt early on helps break down fibres in the meat and vegetables allowing flavour to develop a little quicker. Pepper on the other hand needs to be added right at the end as its flavour is diminished by heat and exposure to the air.

4. Wine is a staple for many a ‘Spag Bol’ recipe which is well suited to beef, effortlessly cutting through the fat with its acidity and the rich flavour will overpower venison’s delicate character.

5. A wide, heavy based pan or preferable casserole allows for even cooking by keeping a stable temperature. A lid simply retains heat and moisture offering yet more stability throughout the cooking.

6. Pasta shape is linked to sauce consistency throughout Italy with recipes sighting specific shapes. Bolognese Ragu is well suited to a wide flat pasta such as tagliatelle, its larger surface area carrying the thinner sauce while being able to hold the meat.

You can read our longer article of Geoff & Chiltern venison here.

Order venison at Chiltern Venison. Ethical, Wild. Oxon & Bucks, England


Latest posts

Tucking In! Recipes by Sophie Wyburd

Liz Nicholls

recipes

We’re sharing a taste from Tucking In by Sophie Wyburd who is the star chef at this month’s Wild Feast in Otmoor Farm in Great Missenden, Buckinghamshire

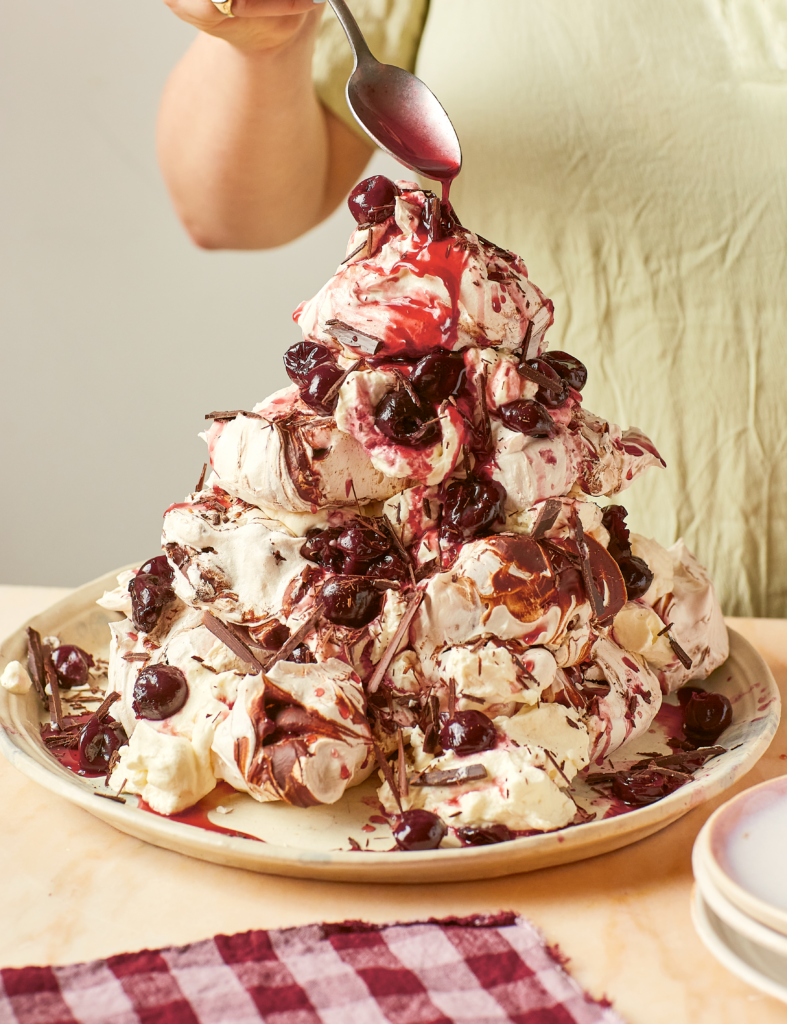
Chocolate & cherry meringue tower

Jeremy Lee is the executive chef at Quo Vadis in Soho, the first and only proper restaurant I ever worked in, and he is famous for making the most fabulous puddings in London, if not the world.

Working there, I assembled many enormous meringue towers, rich with cream, fruit and toasted nuts. This pud is inspired by my time there. It features Black Forest flavours; my dad is passionate about chocolate, cherries and cream as a combination, so when making him a pud, I often use these flavours. This one’s for you, Dad!

This is a proper show-stopping dessert – expect oohs and aahs as you wheel it out of the kitchen.

“Expect oohs and aahs as you wheel it out of the kitchen.”

Serves 8-10 | Cooking 90 minutes, plus cooking
Ingredients
• 40g dark chocolate, plus 15g for grating on top
• 4 large egg whites (save the yolks for another occasion)
• 230g caster sugar
• 450g frozen cherries
• 2 tbsp kirsch (optional)
• 300ml double cream
• 25g icing sugar

Method
1. Preheat your oven to 140°C/120°C fan/gas mark 1 and line 2 large baking trays with baking parchment.
2. Break the chocolate into a heatproof bowl, and microwave it in bursts until it is melted. Alternatively, pop the chocolate into a heatproof bowl set over a simmering pan of water, and let it gently melt. Allow it to cool slightly.
3. Tip your eggs whites into a large mixing bowl, and weigh out 200g of your sugar in a separate bowl. Using electric beaters, whisk the egg whites to stiff peaks. Add a couple of heaped spoonfuls of the sugar, then whisk again until you get stiff peaks. Continue adding the sugar like this until all 200g has been incorporated, and you have a thick, glossy mixture in the bowl.
4. Pour your melted chocolate into the bowl, and gently fold it through as streaks. Take generous spoonfuls of the meringue mixture, and dollop them onto the prepared baking trays in glossy heaps, spaced well apart. You should get about 10 meringues. Place both trays in the oven, and bake them for 1 hour.
5. Meanwhile, add your cherries to a saucepan over a medium heat, along with your remaining 30g of sugar. Bring the mixture to the boil, then reduce the heat to low and simmer gently for 20 minutes, or until the liquid has a thin, syrupy consistency. Stir in the kirsch, if using, then leave it to cool.
6. Pour your double cream into a medium mixing bowl, and add the icing sugar. Whisk with electric beaters until it thickens into soft peaks. Be careful not to overdo it – you don’t want it to look fluffy.
7. Allow your meringues to cool completely. When ready to serve, spoon a little cream onto your chosen serving plate. Add a few meringues on top, and dollop over some cream and cherry compote. Continue to stack meringues, cream and compote on top until they are all used up. Grate over a little more chocolate, then serve.

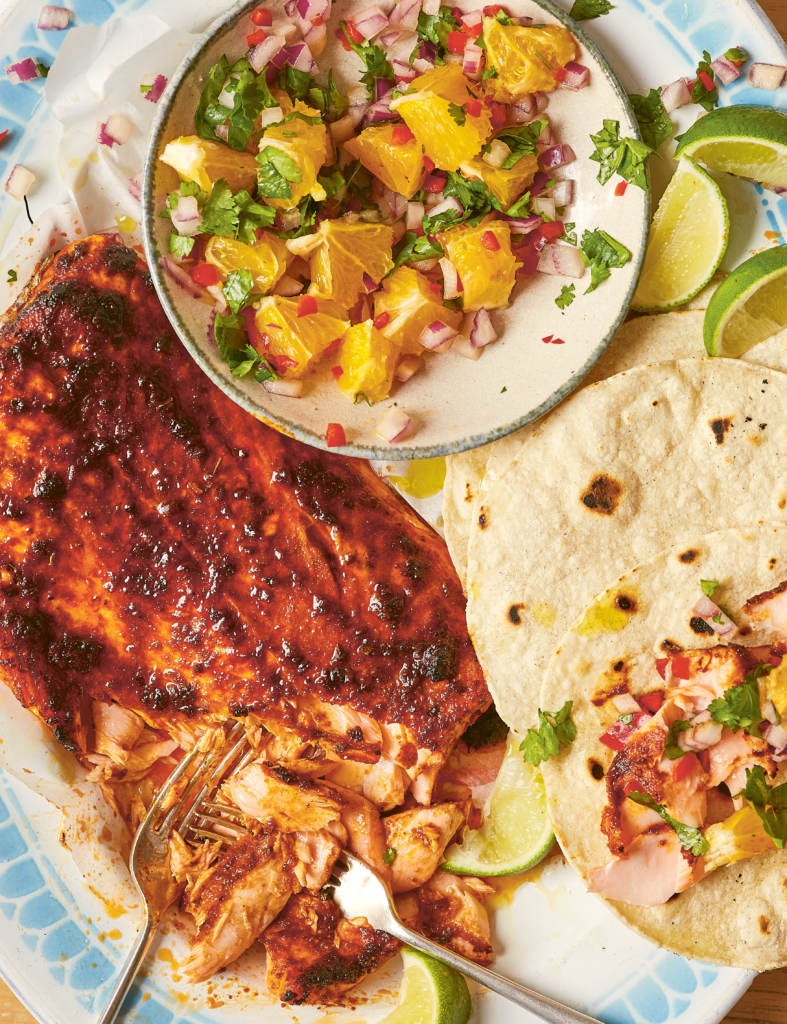
Spiced blackened salmon tacos with orange salsa

There’s a reason why fajita night had every family in a chokehold in the 2000s, and it is because it is a really fun way to eat. Popping lots of things in the middle of the table and getting people to help themselves is relaxed, a little chaotic, and ultimately communal – the way I like all my meals to be. These tacos look much fancier then they are, but in reality this meal involves very little cooking; all you need to do is make zingy salsa, and grill chunky sides of salmon in spices until the flesh is charred. It would make a brilliant dinner on a weekend, on a weekend, but it is also easy to bang together on a Wednesday night after work.

Serves eight | Takes 45 minutes
Ingredients

• 2 tbsp sweet smoked paprika
• 2 tsp ground cumin
• 1½ tsp cayenne pepper
• 1 tsp dried oregano
• 2 tsp soft light brown sugar
• 2 x 600g sides of salmon
• 24 corn tortillas
For the salsa
• 1 red onion
• 2 red chillies
• small bunch of coriander
• 6 oranges
• salt and olive oil

Method
1. Spoon the paprika, cumin, cayenne pepper, dried oregano and soft brown sugar into a bowl, along with 2 teaspoons of salt and 4 tablespoons of olive oil. Mix until you have a paste.
2. Place your sides of salmon in a large baking tray, skin-sides down, and rub the spice paste all over the flesh.
3. Preheat your grill to high.
4. To make the salsa, peel and finely dice the red onion, and finely chop the red chillies. Mix together in a bowl. Roughly chop the coriander, and set it aside. Slice the top and bottom ends off the oranges so that you can stand them up flat, then work your knife around them to peel off the skin. Cut the flesh into 2cm rounds, then dice them into 1cm chunks.
5. Add the diced orange to the bowl with the onion and chilli, along with any juices, then give it all a good mix to combine.
6. Place your salmon under the hot grill and cook for 7-8 minutes – the top will char and get a beautiful crust, while the flesh will stay tender and soft.
7. While your salmon cooks, heat your tortillas. Turn a small burner on your hob to high and place your tortillas one at a time on the grate above the flame. Cook for a few seconds on each side, turning them over with metal tongs. Keep them warm by wrapping them in a clean tea towel while you cook the rest. Alternatively, cook them for about 20 seconds on each side in a hot, dry frying pan.
8. Stir the coriander into the salsa. Pop your tortillas onto plates, and bring the salmon and salsa to the table, then let everyone serve themselves by flaking off the salmon, and adding it to their tortillas with a spoonful of salsa.


Latest posts

Emily Kerrigan’s Gluten-Free Kitchen & competition

Liz Nicholls

recipes

Follow us

We share some fuss-free food inspiration from The Gluten-Free Kitchen by registered nutritionist Emily Kerrigan from Thame, published by Vie, £10.99

Summer rolls

Rice papers and rice noodles are two fantastic staples in a gluten-free kitchen. These summer rolls might look tricky but once you make the first one or two, you’ll realise they’re actually pretty straightforward. Pack in a lunchbox or make a big batch and serve to a group as finger food.

Makes 12 | Takes 30 minutes
Ingredients:
• 100g (3½ oz) vermicelli rice noodles
• 1 carrot, julienned
• a handful of coriander, finely chopped
• a handful of mint leaves, finely chopped
• 12 large rice paper wrappers
• large lettuce leaves
• a few handfuls of cooked chicken, shredded
• lime wedges, for squeezing over
• gluten-free sweet chilli
• dipping sauce, for serving

Method
• Cook the noodles according to pack instructions then drain and set aside. Mix together the carrot and herbs in a bowl and set aside. Fill a dish wide enough to fit your rice paper wrappers with room temperature water.
• Immerse a wrapper in the water until it softens then lay it on a clean chopping board. Take a lettuce leaf and fill with a little each of the noodles, carrot, herbs and chicken. Roll up the filled lettuce leaf – this keeps the filling in place and makes the rolls easier to eat. Place the rolled lettuce cup on the wrapper towards the centre left. Fold the top and bottom of the wrapper inwards, then roll it up lengthways. Slice in half if you like.
• Repeat for all 12 rolls and serve with lime wedges for squeezing over plus sweet chilli dipping sauce.

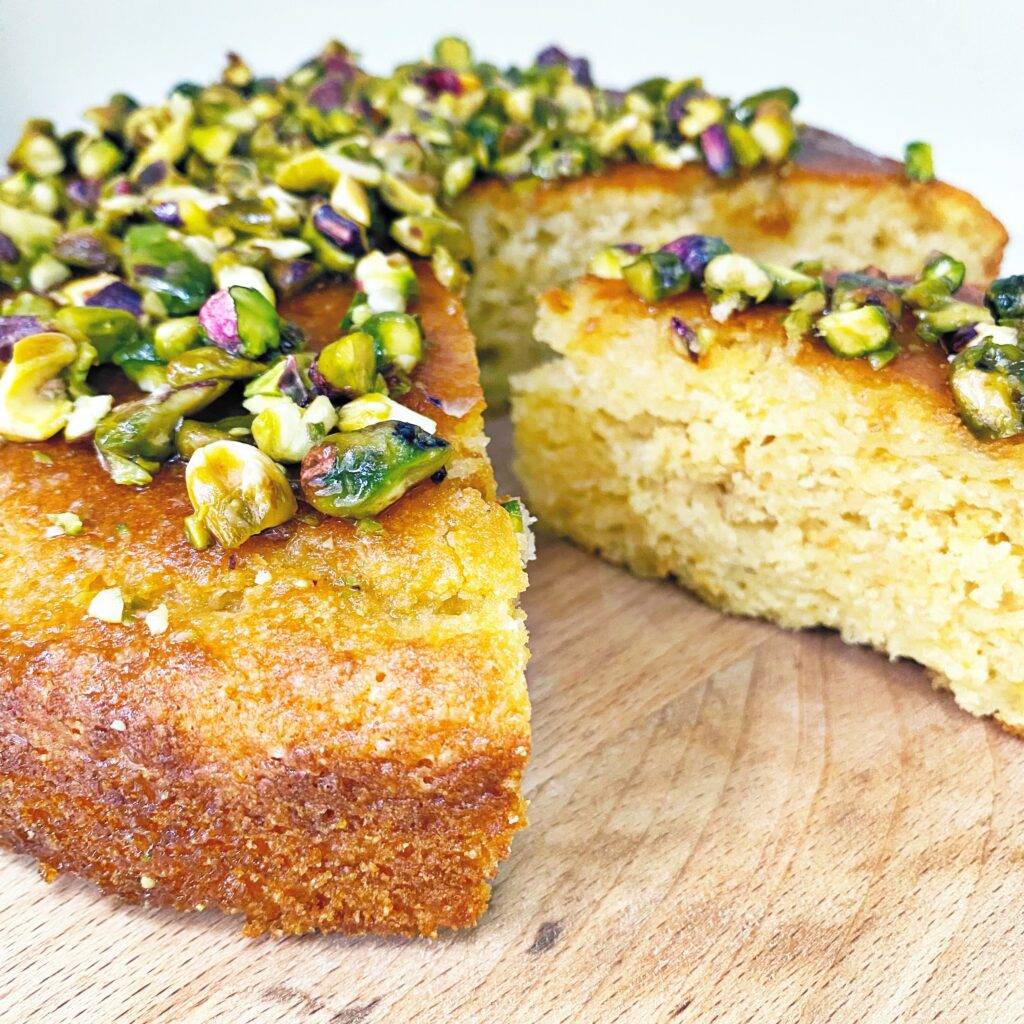
Lemon drizzle cake

Polenta and ground almonds are gluten-free baking staples, providing bite to this fluffy cake and keeping it lovely and moist. The lemony, syrupy pistachio nuts on top make it extra special.

Makes 1 cake | Takes 1 hour 10 minutes
Cake Ingredients
• 175g (6 oz) gluten-free self-raising flour
• 1½ tsp gluten-free baking powder
• 50g (2 oz) ground almonds
• 50g (2 oz) polenta
• 2 lemons, zested
• 140g (5 oz) golden caster sugar
• 2 eggs
• 225g (8 oz) natural yoghurt
• 75ml (3fl oz) rapeseed oil

For the topping
• 60g (2 oz) caster sugar
• 2 lemons, juiced
• 50g (2 oz) pistachios, chopped

Method
• Preheat the oven to 180°C/160°C fan/350°F/gas mark 4 and grease and line a deep 20 cm (8 in.) round cake tin. Put the flour, baking powder, ground almonds, polenta, lemon zest and golden caster sugar in a bowl (keep the lemons to juice for the topping). Beat the eggs together with the yoghurt until smooth and add to the dry ingredients with the rapeseed oil. Fold everything together. Spoon into the tin, level off with a spoon and bake for 35-40 minutes. If it is looking a little brown in the final 10 minutes you can cover it loosely with foil.
• Towards the end of baking, make the topping by heating the caster sugar and lemon juice in a saucepan over a low heat. Once the sugar is dissolved, remove from the heat and stir in the chopped pistachios.
• Cool the cake for 15 minutes in the tin then remove from the tin and sit on a wire rack set over a baking tray (to catch any drips). Poke holes in the surface of the cake with a fork or skewer then spoon over the nut syrup, letting it soak in a little between additions. Leave to cool completely before slicing.

Read about how Emily’s daughter’s experience with Coeliac Disease inspired this book here.

We have three copies of The Gluten-Free Kitchen to give away; enter here.


Latest articles

Fitwaffle’s No-Bake Baking for families

Round & About

recipes

We’re sharing a taste of easy oven-free recipes from the book by Eloise Head AKA Fitwaffle who will star at Big Feastival

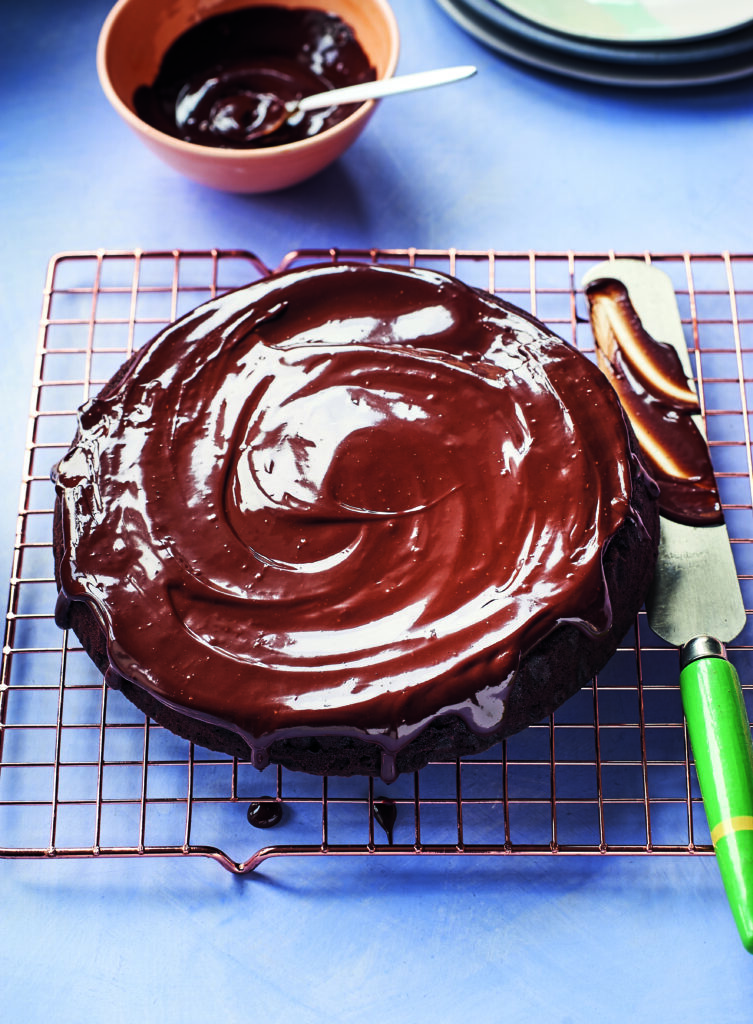
Microwave chocolate cake

No one will ever know this cake was made in the microwave! It’s unbelievably soft and moist, topped with a rich chocolate ganache. If you want to make a cake, but don’t want to turn on the oven, this chocolate cake is perfect. Plus it’s so easy to make and you don’t even need any eggs.

Ingredients:
For the cake
• 150g (1¼ cups) plain (all-purpose) flour, heat-treated
• 100g (½ cup) granulated sugar
• 60g (8tbsp) cocoa powder
• 2 tsp baking powder
• 90g (6 tbsp) unsalted butter, melted, or 6 tbsp vegetable oil
• 380ml (scant 12/3 cups) warm water

For the topping
• 150g (5.25oz) dark chocolate, broken into pieces
• 150ml (2/3 cup) double (or heavy) cream

Method:
Cake
1. Grease and line an 18cm (7in) round microwave-safe cake mould with non-stick baking paper.
2. In a large mixing bowl, mix together the flour, granulated sugar, cocoa powder and baking powder using a balloon whisk until combined.
3. Pour in the melted butter or vegetable oil and warm water and beat until runny and smooth.
4. Pour the batter into your cake mould.
5. Microwave on medium heat for 5-6 minutes until a toothpick inserted into the centre of the cake comes out with a few moist crumbs on it. Check the cake about 1 minute before you think it’s cooked. If you overcook it, it can become dry and rubbery.

Topping
6. Put the chocolate and cream into a microwave-safe jug or small mixing bowl and microwave on medium for 1 minute 20 seconds. Leave to stand for 1 minute, then stir gently until smooth and combined.
7. Transfer to a serving plate and pour the ganache over the cooled cake, letting it drip over the edges slightly, and smooth it out.
8. Let the ganache set at room temperature, then cut into 8 slices and serve. Enjoy!
9. Store in an airtight container in the refrigerator for up to 4 days. If eating the cake after it’s been in the refrigerator, leave at room temperature for at least 30 minutes before serving.

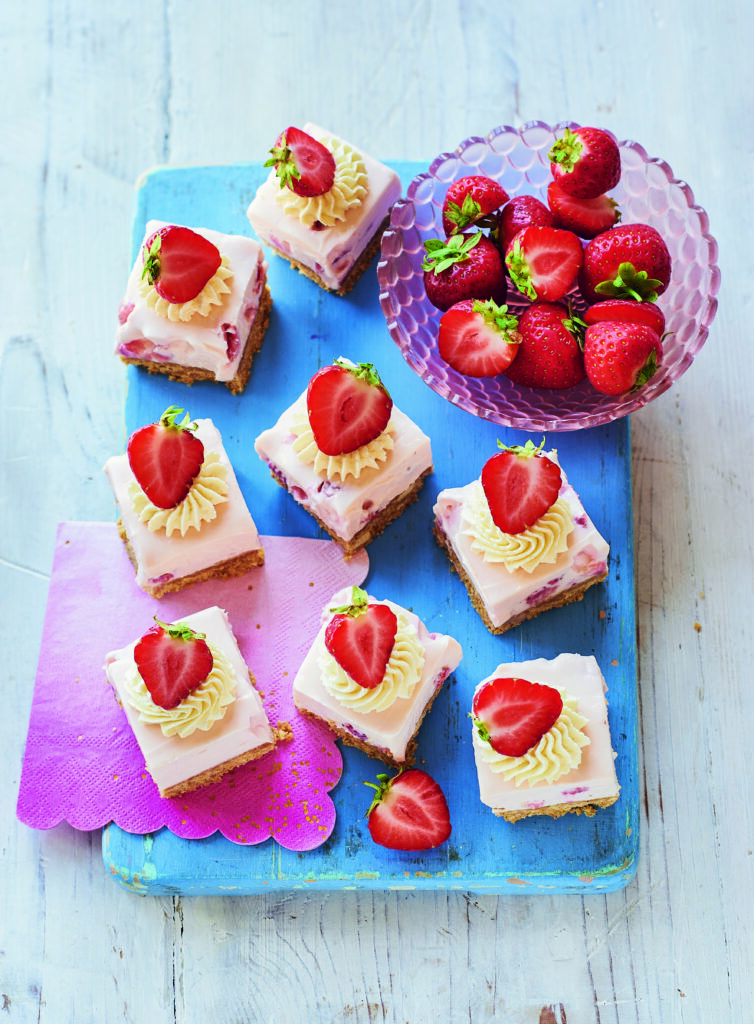
Strawberries and cream cheesecake bars

These cheesecake bars are fresh and fruity and so creamy and delicious. They have a buttery biscuit base, a creamy cheesecake filing packed with strawberries, topped with whipped cream and fresh strawberries. Perfect for a summer barbecue.

Ingredients:
For the base
• 250g (9oz) digestive biscuits (or graham crackers)
• 100g (3.5oz) unsalted or salted butter, melted

For the filling
• 500g (1lb) full-fat cream cheese, at room temperature
• 150g (1¼ cups) icing (powdered) sugar
• 1 tsp vanilla extract
• Pink food colouring (optional)
• 100g (3.5oz) fresh strawberries, diced

For the topping
• 200ml (scant 1 cup) cold double (or heavy) cream
• 8 fresh strawberries, halved, to decorate

Method:
For the base
1. Line a 20cm (8in) square baking tin with non-stick baking paper.
2. Put the biscuits into a food processor and process until finely crushed. Alternatively, put them into a plastic bag and crush with a rolling pin. Tip into a medium mixing bowl, then pour in the melted butter and mix with a spoon until fully combined.
3. Press the mixture firmly into the bottom of your prepared tin with the back of a spoon, then pop into the refrigerator while you make the filling.

For the filling
4. In a large mixing bowl, beat together the cream cheese, icing (powdered) sugar, vanilla extract and pink food colouring, if using, with an electric hand mixer until smooth, then fold through the diced strawberries.
5. Remove the chilled base from the refrigerator, then spoon on the filling, smoothing it out to the edges.
6. Chill in the refrigerator for at least 4 hours, or overnight, until completely set. Cut into squares.

For the topping
7. Whip the cream with an electric hand mixer to stiff peaks. Pipe the whipped cream in a swirl on top of each square. Place half a strawberry into the whipped cream, as shown in the photo, for decoration. (I find it easiest to do the topping after the cheesecake has been cut into squares).
8. Store in the refrigerator for up to three days.


Green & easy! Wonderful watercress recipes

Round & About

recipes

May brings us the start of British watercress season, thanks to The Watercress Company’s recipes

Watercress is packed with over 50 vitamins and minerals, including exceptionally high levels of vitamins C, E and A, folate and calcium.  It is also rich in iron (nearly twice as much as spinach) that’s more easily absorbed, making it an essential addition to any vegetarian or vegan diet.  

Another little-known fact about watercress relates to amino acids; compounds that play many critical roles in the body, including regulating the immune function and building muscle. The best sources of essential amino acids are animal proteins like meat, eggs, and poultry but, unusually for a plant, watercress has a full complement of the nine essential amino acids.

Hot honey salmon  & watercress salad

Ingredients:

• 80g watercress

• Two salmon fillets

• One lemon, quartered

• One avocado, sliced

For the hot honey:

• 50ml honey

• Two garlic cloves, halved

• 1-2 tsp chilli flakes

For the quick pickled red onions:

• ½ red onion, thinly sliced

• 2tbsp vinegar – white wine
or apple cider

• ½ tsp salt

•1tsp sugar

“Watercress has a full complement of the nine essential amino acids”

Method:

1.        For the hot honey, warm the honey gently in a small pan. Add the garlic and chilli flakes and allow to infuse. Once fragrant and spicy, remove from the heat.

2.        For the red onions, in a bowl or jar with a lid, add the sliced onion. Pour over the vinegar before sprinkling
in the salt and sugar. Give it a mix, or shake, to combine and
let it sit while you prepare everything else.

3.        Brush one side of the salmon with the hot honey. Lay it coated side down in a hot pan and cook for five or six minutes. Brush the topside with a little more of the honey, flip and repeat.

4.        To assemble the salad, split the watercress between two plates. Add ½ the avocado to each plate. Top with the salmon fillets and a spoonful of the red onion. Drizzle everything with a little more of the hot honey.

5.        Serve with the lemons, squeezing fresh lemon juice over everything.

Ä Roast broccoli, Parmesan & watercress salad

Ingredients:

• 140g broccoli florets, about half a head of broccoli

• 40g watercress

• 30g Parmesan, shaved

• 15g pomegranate seeds

•Oil, salt & pepper

Method:

1.         Preheat the oven to 180°. On a baking tray, arrange the broccoli florets. Spray or drizzle a little oil over the broccoli and sprinkle with a pinch of salt and pepper. Roast in the oven for about 10-12 mins, until the broccoli is cooked.

2.         In a bowl, toss the cooked broccoli together with the watercress and arrange on a plate. On top, shave the parmesan over the salad. Sprinkle with pomegranate seeds for a pop of sweetness.

For these and other inspiring watercress recipes, visit watercress.co.uk or find LoveWatercress on Facebook and Instagram

Hard & Fast

Round & About

recipes

We’re sharing a taste of The Fast 800 Keto recipe book, as seen on Channel 4’s Lose A Stone In 21 days by Dr Clare Bailey who is on tour with her husband Dr Michael Mosely this month

Creamy broccoli, ginger and coriander soup

A light soup with the warming qualities of coconut, ginger and coriander running through it. The recipe makes enough for four but it keeps well in the fridge or freezer.

Serves 4, Prep 5-7 minutes, Cook 15-20 minutes.

Ingredients

1 small onion, peeled and roughly chopped, 40g fresh root ginger, roughly chopped (no need to peel)

1 and half tbsp oil

1 head of broccoli, roughly chopped

1x 400ml tin coconut milk

Vegetable stock cube

15g fresh coriander

40g flaked almonds, toasted, to garnish

Cook’s tip:

Add a protein top-up if you like. Fried diced bacon or feta cheese would go well

1. Place the onion, ginger and olive oil in a large saucepan over a medium heat and saute for three or four minutes until softened

2. Add the broccoli, coconut milk, stock cube and 800ml water (simply refill the empty tin twice). Bring to the boil, reduce the heat and simmer for 10 minutes.

3. Remove from the heat, add the coriander and blitz with a stick blender until completely smooth. Season with salt and freshly ground black pepper and serve, topped with flaked almonds.

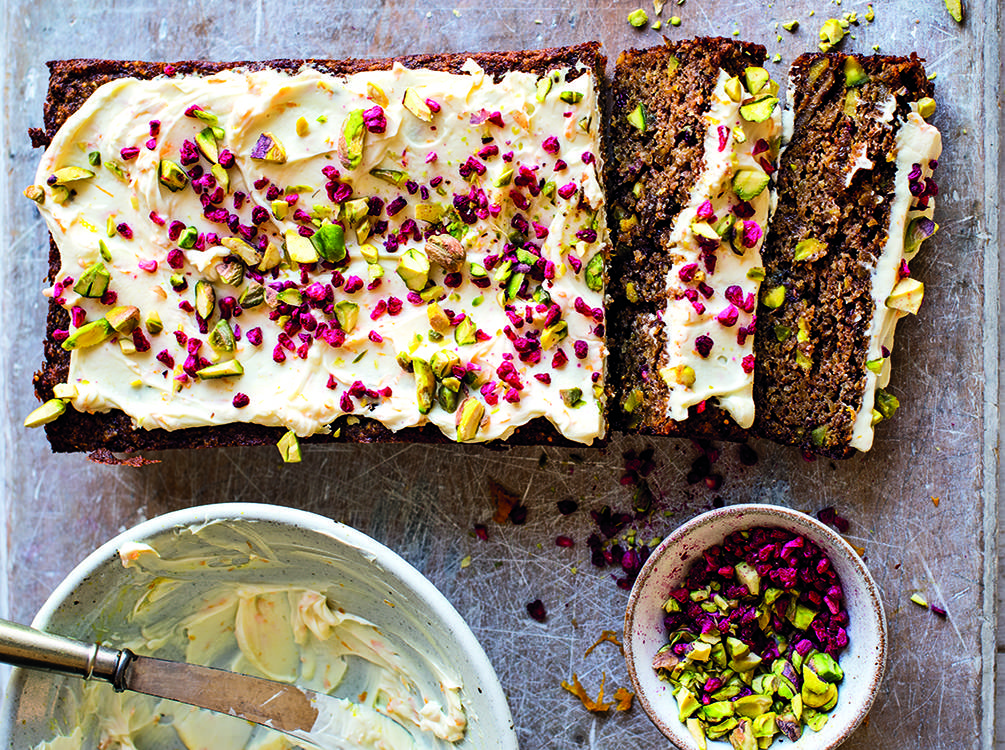
Persian love cake


Loosely based on a Persian Love Cake, this enchantingly exotic concoction lives up to its name. not sure I do it justice, but it certainly goes down well, with its tangy, orange-flavoured topping, and rich, nutty base. High in protein and nutrients, it has no added sugar, is low-carb and feels like a real treat… Enjoy

Serves 8, Prep 30 minutes, Cook 30 minutes

Ingredients

100g dried figs, finely chopped

60g coconut oil or butter

Two medium free range eggs

60g shelled pistachio nuts, roughly chopped

Two medium oranges, zested and juiced

100g almonds

1tsp ground cinnamon

1tsp bicarbonate of soda

2 tbsp free-dried raspberries

1 tbsp cider vinegar

For the icing

60g cream cheese

1tsp honey

1tsp lemon zest

Cook’s tip:

This freezes well (so you don’t need to eat it all at once, as Michael is frequently tempted to do). You could use a loaf tin liner if you have one.

1. Preheat the oven to 180C / Fan 160C/ gas 4. Line the base of a 20cm x 10cm loaf tin with parchment paper.

2. Place the figs, coconut oil and eggs in a bowl and blitz with a stick blender for about a minute, until creamy but retaining some texture.

3. Stir in 40g of the pistachios, the orange juice, half the orange zest, the ground almonds, cinnamon, cardamom, bicarbonate of soda, half the dried raspberries and a generous pinch of salt. Mix well, then add the cider vinegar and mix again.

4. Pour the mixture into the loaf tin and bake for about 30 minutes until cooked through and a skewer inserted into the centre comes out clean. Turn out of the tin and leave to cool on a wire rack.

5. To make the Topping, mix the remaining orange zest with the cream cheese, honey and lemon zest in a small bowl. Spread it on to the cooled cake, then sprinkle the remaining chopped pistachios and dried raspberries on top.

Emily Roux’s packed lunch recipes

Round & About

recipes

Chef Emily Roux and Lexus have rustled up some posh packed lunches to enjoy in the car or on your next road trip!

Typical packed lunch fare such as pasties, soggy sandwiches and packets of crisps, can be bland and unappetising, so Lexus has teamed up with renowned chef Emily Roux to create some gourmet recipes that are perfect to eat in the car. Emily’s carefully crafted, delicious creations are easy to prepare and perfect if your picnic has been rained off, or if you’re waiting for a ferry or Eurotunnel.

Emily has honed her culinary skills in some of Europe’s most acclaimed restaurants and today is the co-owner of Caractère restaurant in London’s Notting Hill. She has used her expertise to create simple recipes that can add an element of delicacy and luxury to your packed lunch.

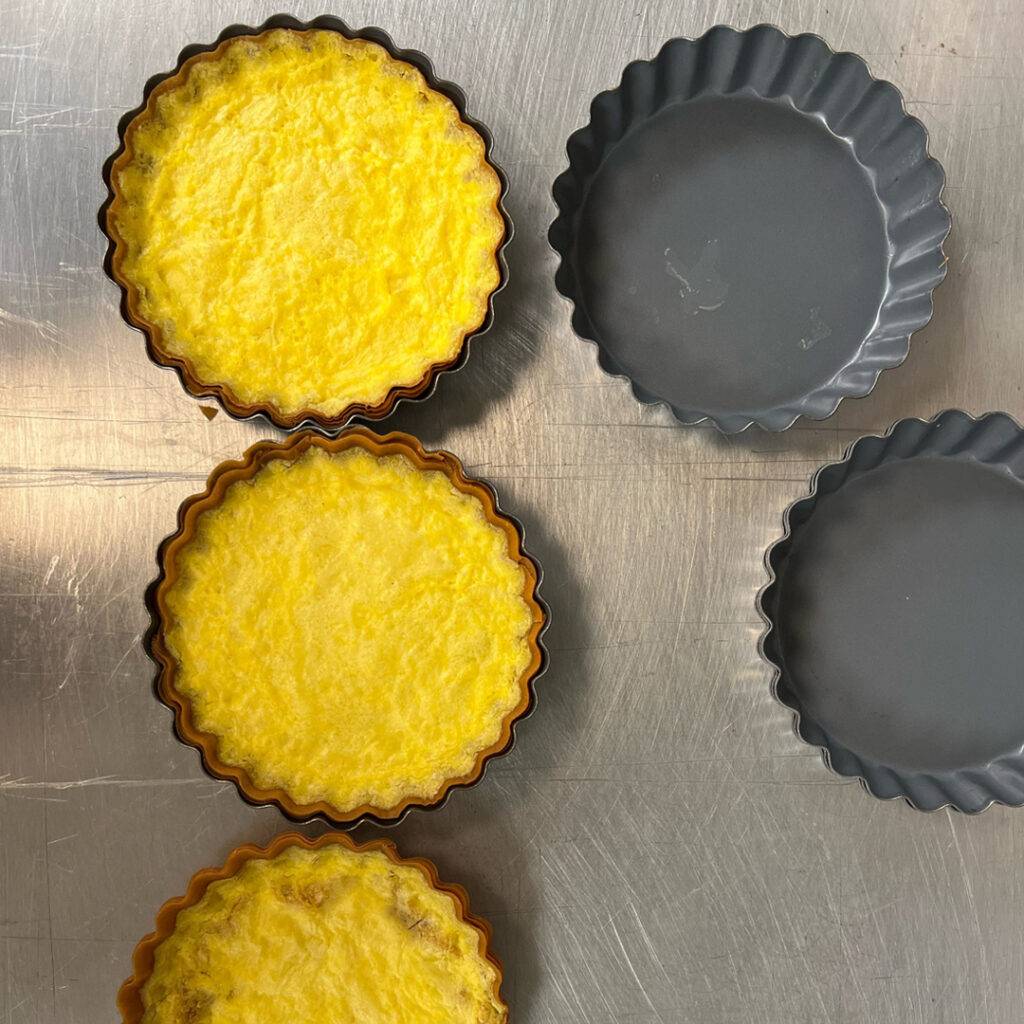
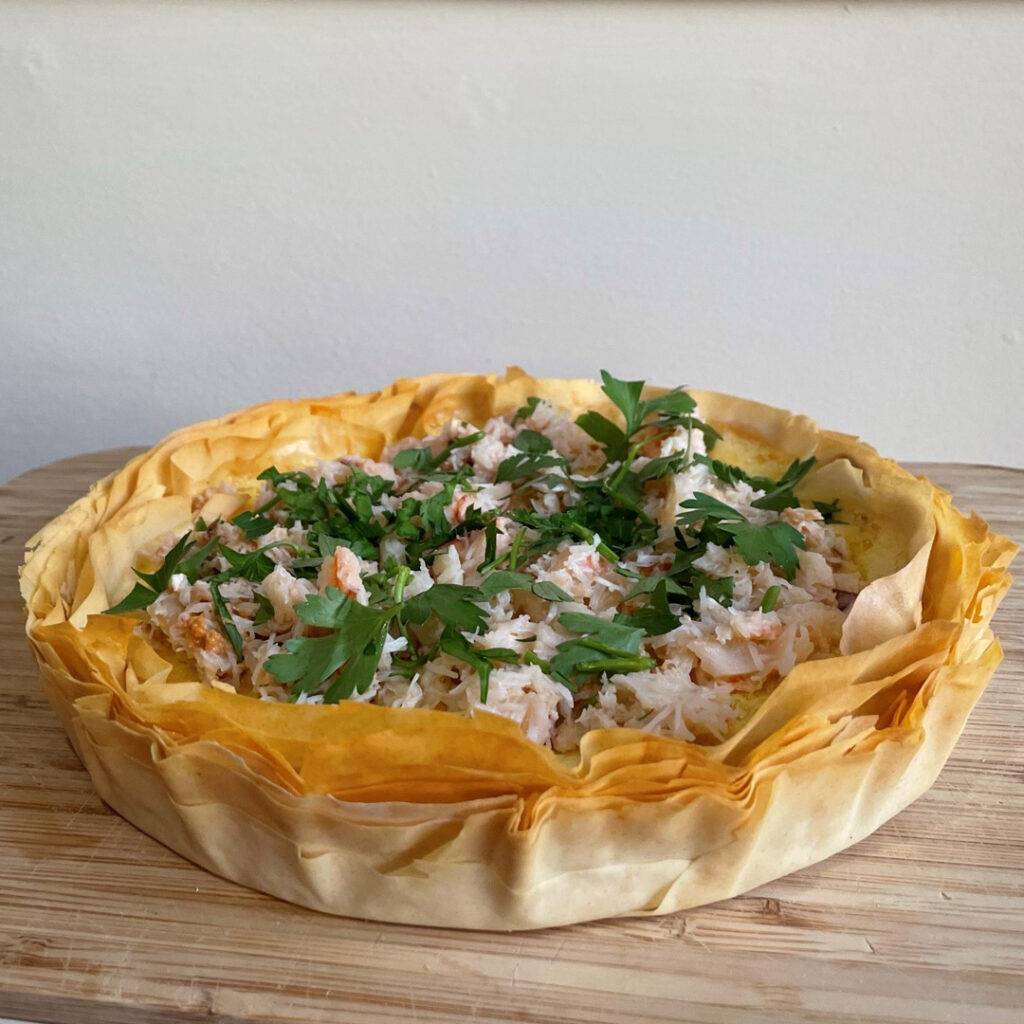
Wasabi crab tartlets

Ingredients:
• 250g double cream
• 70g milk
• 5g wasabi powder or paste
• 4g salt
• Two egg yolks
• One whole egg

Other ingredients:
• 270g pack of ready-made filo pastry
• 20g melted butter (for brushing)
• 100g picked crab (white, brown, or mixed according to preference)
• Zest of one lemon
• Fresh chives, mint leaves, coriander, or other herbs to suit personal taste
• Salt, pepper, olive oil

Method:

1. Preheat oven to 165°C fan (325°F/gas mark 4).
2. Brush each layer of filo with melted butter, stacking at least four sheets on top of each other.
3. Press and cut to the dimensions of your tart moulds.
4. Bake each filo stack in the moulds, with pressure on top, for between seven and 10 minutes (or until crispy and golden). To create the weighted pressure, ideally use the same-sized mould inserted one into the other; alternatively, baking beans will do the trick.
5. Leave to cool and lower the oven temperature to 165°C fan (325°F/gas mark 4).
6. Meanwhile, use a handheld blender to blitz all the wasabi cream ingredients together. Pass the mixture through a sieve for a smooth finish.
7. Once the tartlets have completely cooled, pour in the cream mix, filling to halfway.
8. Bake in the oven for a further 15 minutes until the mixture has cooked through and solidified.
9. Leave to cool – the tartlets are designed to be eaten at room temperature.
10. Season the crab to your taste and add any chopped fresh herbs that take your fancy.
11. Top tartlets with seasoned crab.

For a vegetarian alternative, replace the crab with mushrooms or courgette shavings and fresh herbs.

Dark chocolate crinkle cookies

Temperature and timing are very important with this recipe, so it is best to have all the ingredients weighed out before you start.

Ingredients:
• 200g dark chocolate, finely chopped
• 125g unsalted butter, diced
• 150g caster sugar
• 100g light brown sugar
• Two eggs
• 130g plain flour
• 3 tbsp cocoa powder
• 1 tsp baking powder
• 1tsp sea salt (for sprinkling)

Method:

1. Line two baking trays with baking paper and preheat the oven to 175°C, fan oven (350°F/gas mark 4).
2. Place the butter and chocolate in a basin over a bain marie or a saucepan of gently boiling water, ensuring the bottom of the bowl doesn’t touch the water. Stir occasionally until the mixture is fully melted.
3. Remove the bowl from the heat and set aside. In the bowl of a stand mixer, whisk together the eggs and sugars on medium-high speed, for five minutes.
4. Once the eggs and sugar have been mixing for exactly five minutes, pour in the chocolate mixture and mix for a further minute or so to combine.
5. Meanwhile, mix together the dry ingredients, then add to the mixer bowl, mixing briefly until just combined.
6. Use an ice cream scoop to form the cookies. The batter will be a little on the wet side. Make sure to leave plenty to space between each cookie on the baking tray, as they will spread as they cook.
7. Sprinkle each cookie with a little flaked sea salt before placing into the oven and baking for 12 minutes. The cookies will come out of the oven with a wonderful, crinkled look and a slightly domed shape. They will collapse a little as they cool but this helps form that perfect fudgy centre.
8. Sprinkle on a little sea salt to taste and let the cookies cool for at least 20-30 minutes.

Green goodness in watercress season

Round & About

recipes

Watercress is abundant at this time of year and it’s packed full of goodness with many health benefits

Grilled Nectarine & Feta Salad (pictured above)

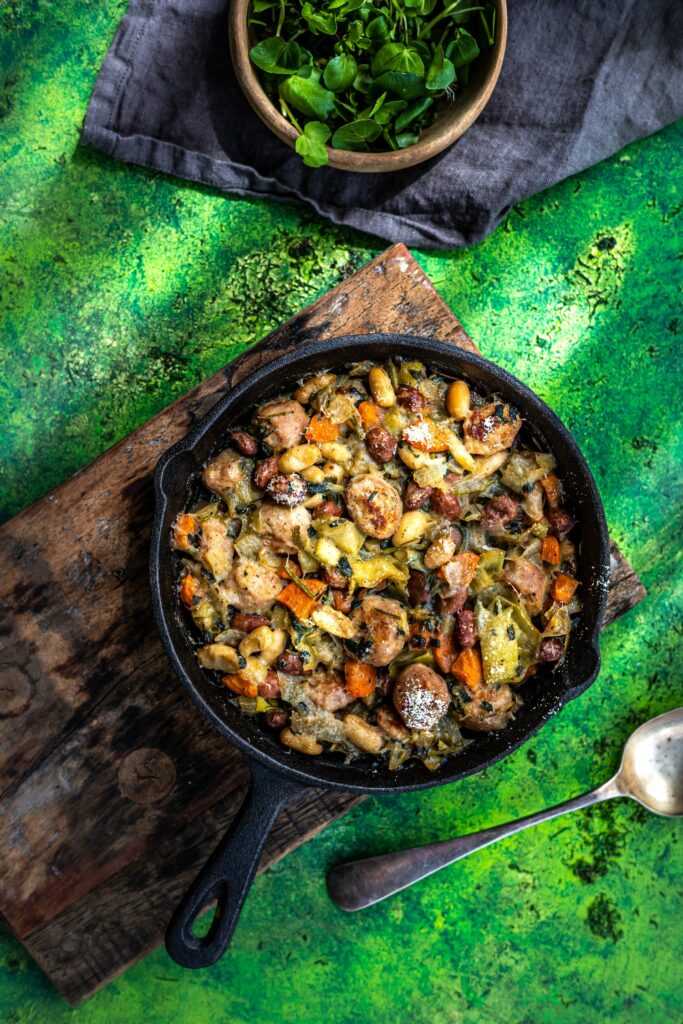
Classic cassoulet

Want to keep reading?

Download the FREE Round & About App to view the full article.

For IOS
For Android

Italian delights from Gennaro Contaldo’s

Round & About

recipes

We’re sharing a taste of Gennaro’s Cucina: Hearty Money-Saving Meals from an Italian Kitchen by Gennaro Contaldo, out now published by Pavilion Books

Ä Linguine alla puttanesca

This typical Neapolitan dish is sometimes referred to as pasta alla marinara or simply as con olive e capperi, which are com-mon ingredients is this part of Italy. The name Puttanesca came about in the mid-20th century it was claimed that this dish was served in the brothels of Naples – puttana means ‘whore’ in Italian. Another theory was that a restaurant owner on the island of Ischia put together this dish when a group of late-night customers asked him to make una puttanata qualsiasi – in other words, make whatever you’ve got to hand. And that is exactly what he did with the ingredients he found in his kitchen. Whatever the reason behind its title, this spicy pasta dish is quick and simple to prepare with store cupboard ingredients.

Ribollita

This traditional hearty Tuscan soup is perfect for using up vegetables and stale bread. It was born out of a necessity to make meals go further and last longer. It was probably also made to be eaten for several days, hence its name Ribollita, which means “to reboil”. You can use any type of cabbage, spring greens and spinach and basically any vegetables you have.

Want to keep reading?

Download the FREE Round & About App to view the full article.

For IOS
For Android